Hi there,
Let me put this straight – I’m in love with lavender. Its scent reminds me of happiness, and I love the way it looks – so elegant and with a special touch. Not to mention its health benefits are countless! Inspired by it, I’d like to share with you something really beautiful: a decoration for you hair – lavender hairpin. It’s a quite easy tutorial on how to make lavender flowers with beads. Well, maybe not that easy, but so so pretty!
Where does this lavender hairpin starts? Of course in making a flower from beads itself!
What do we need to create this cute lavender flower from beads? Beads of course! In this case 50 shades of purple :). As shown on the picture below, I used 6 different kinds of purple beads: bigger and smaller, darker and lighter, cheaper and more expensive. The more variety – the better. This will only make our beads’ lavender prettier! And, not to forget, I used around 50 cm / 20 in of wire as well for a flower approx. 3 cm / 1 in long.

Types of beads needed for a lavender flower
After you have everything ready, it’s time to start! The next photo collage shows you 3 easy steps how to make a lavender flower.

Easy steps for making lavender from beads
- Step 1: take the smallest and lightest purple beads and form the top of the flower;
- Step 2: move slightly down and add another set of small beads, but this time add some darker ones too;
- Step 3: go down and start adding new beads, using all kind of your purple beads (note from me: adding your first big piece will be a little challenging, as it may seem odd, but trust me, it will look just fine :))
So just keep going down and adding more and more beads. Stop when the lavender looks right to you. For the lavender hair pin we’ll need a bigger and a smaller flowers, just like shown below.

Cute lavender flowers from beads
The next thing, that we are going to do, is beading some green leaves for our hair accessory. This is quite simple, so I’ve put the steps into a collage below.

Making leaves from beads in easy steps
- Step 1: prepare the beads and the wire (about 35 cm / 14 in);
- Step 2: in the center of the wire fix the top of the biggest leaf and add +/- the same amount of beads to both sides of the wire;
- Step 3: fix the leaf and start doing a new one in the same technique, adding an extra space between the leaves.
I used two different green colors to make the future hairpiece more fun, but, of course, this is fully up to you. Another idea, which I had on my mind, was making a half of the leaf darker than the other (like it was a shadow). And I also thought of using 3 green colors for leaves. But you see which option I went for :).
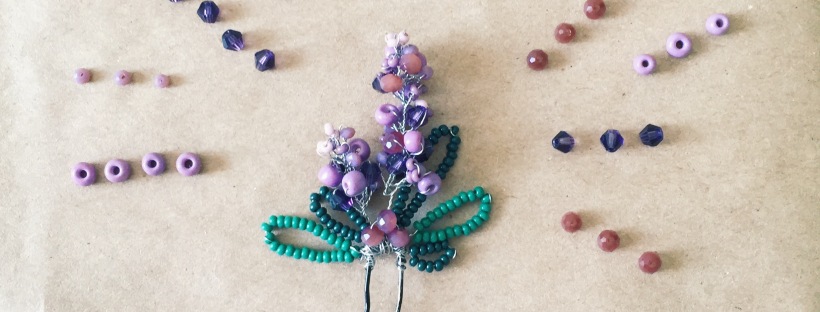
After you’ve done with leaves and flowers (in my case I made 5 leaves and 2 flowers), it’s time to put it on a hairpin. Yaaay!
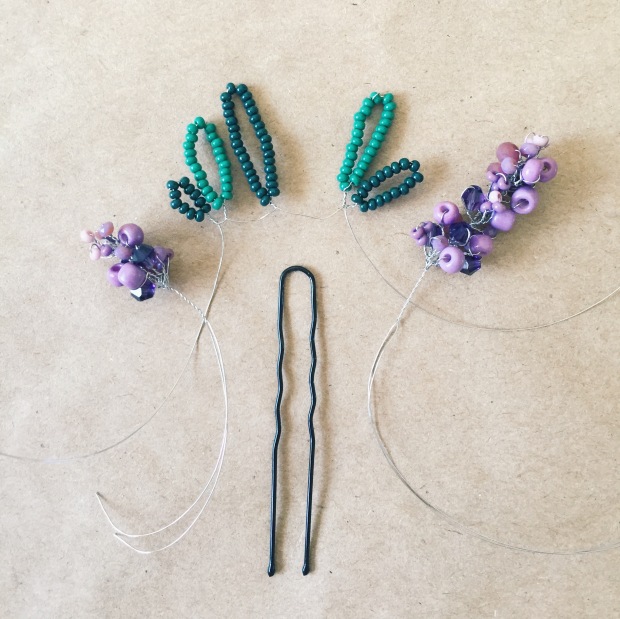
Soon-to-be a lavender hair pin
As for me, I prefer binding leaves to the pin first, rather than the flowers, because it gives me more flexibility. Just twist each leaf around a hairpin and then additionally fix it with the left wire piece, so everything holds in one. The same with flowers: turn the wire many times around the pin and make sure everything is tight and steady.
And, to add an extra touch (and to hide my messy wire on the pin), I’ve decided to add 3 same purple beads to the center of the piece. Ta-dah! The pin is ready!

Finished handmade lavender hair decoration
Of course, this is just my idea of how a lavender hairpin looks like. You could customize it in any way possible.
So tell me what you think! Would you put this hair pin in your hair? I definitely would! And when I will, I’ll leave here a link with an Instagram photo 🙂
And for now, see you!
Yuliya

Wow! This is amazing! Soo pretty, I love it. Definitely going to try this. 🙂
LikeLike
Thank you so much! 🙂
LikeLiked by 1 person
This is amazing … amazinggggg . Loved your blog
http://www.voguishlegacy.wordpress.com
LikeLiked by 1 person